Creating a Custom Webhook
Webhooks are automated messages sent from MediaSilo when something happens. The messages can be sent anywhere you want, allowing you to integrate MediaSilo with any external system, including your own. We send a message to an HTTP endpoint, and you do whatever you wish with that message.
Setup
When developing webhook integrations, we recommend a quick and simple way to view the messages that your webhook integration is receiving. To start, consider setting up a Request Bin. This is a fast way to get a server listening to the messages sent from MediaSilo. You'll be able to see the information you get back from MediaSilo in response to an action taken by one of your team members.
You don't need requestbin
If you prefer, you can set up your own server instead. We're showing you requestbin in this example in case you don't have the ability to set up your own http server.
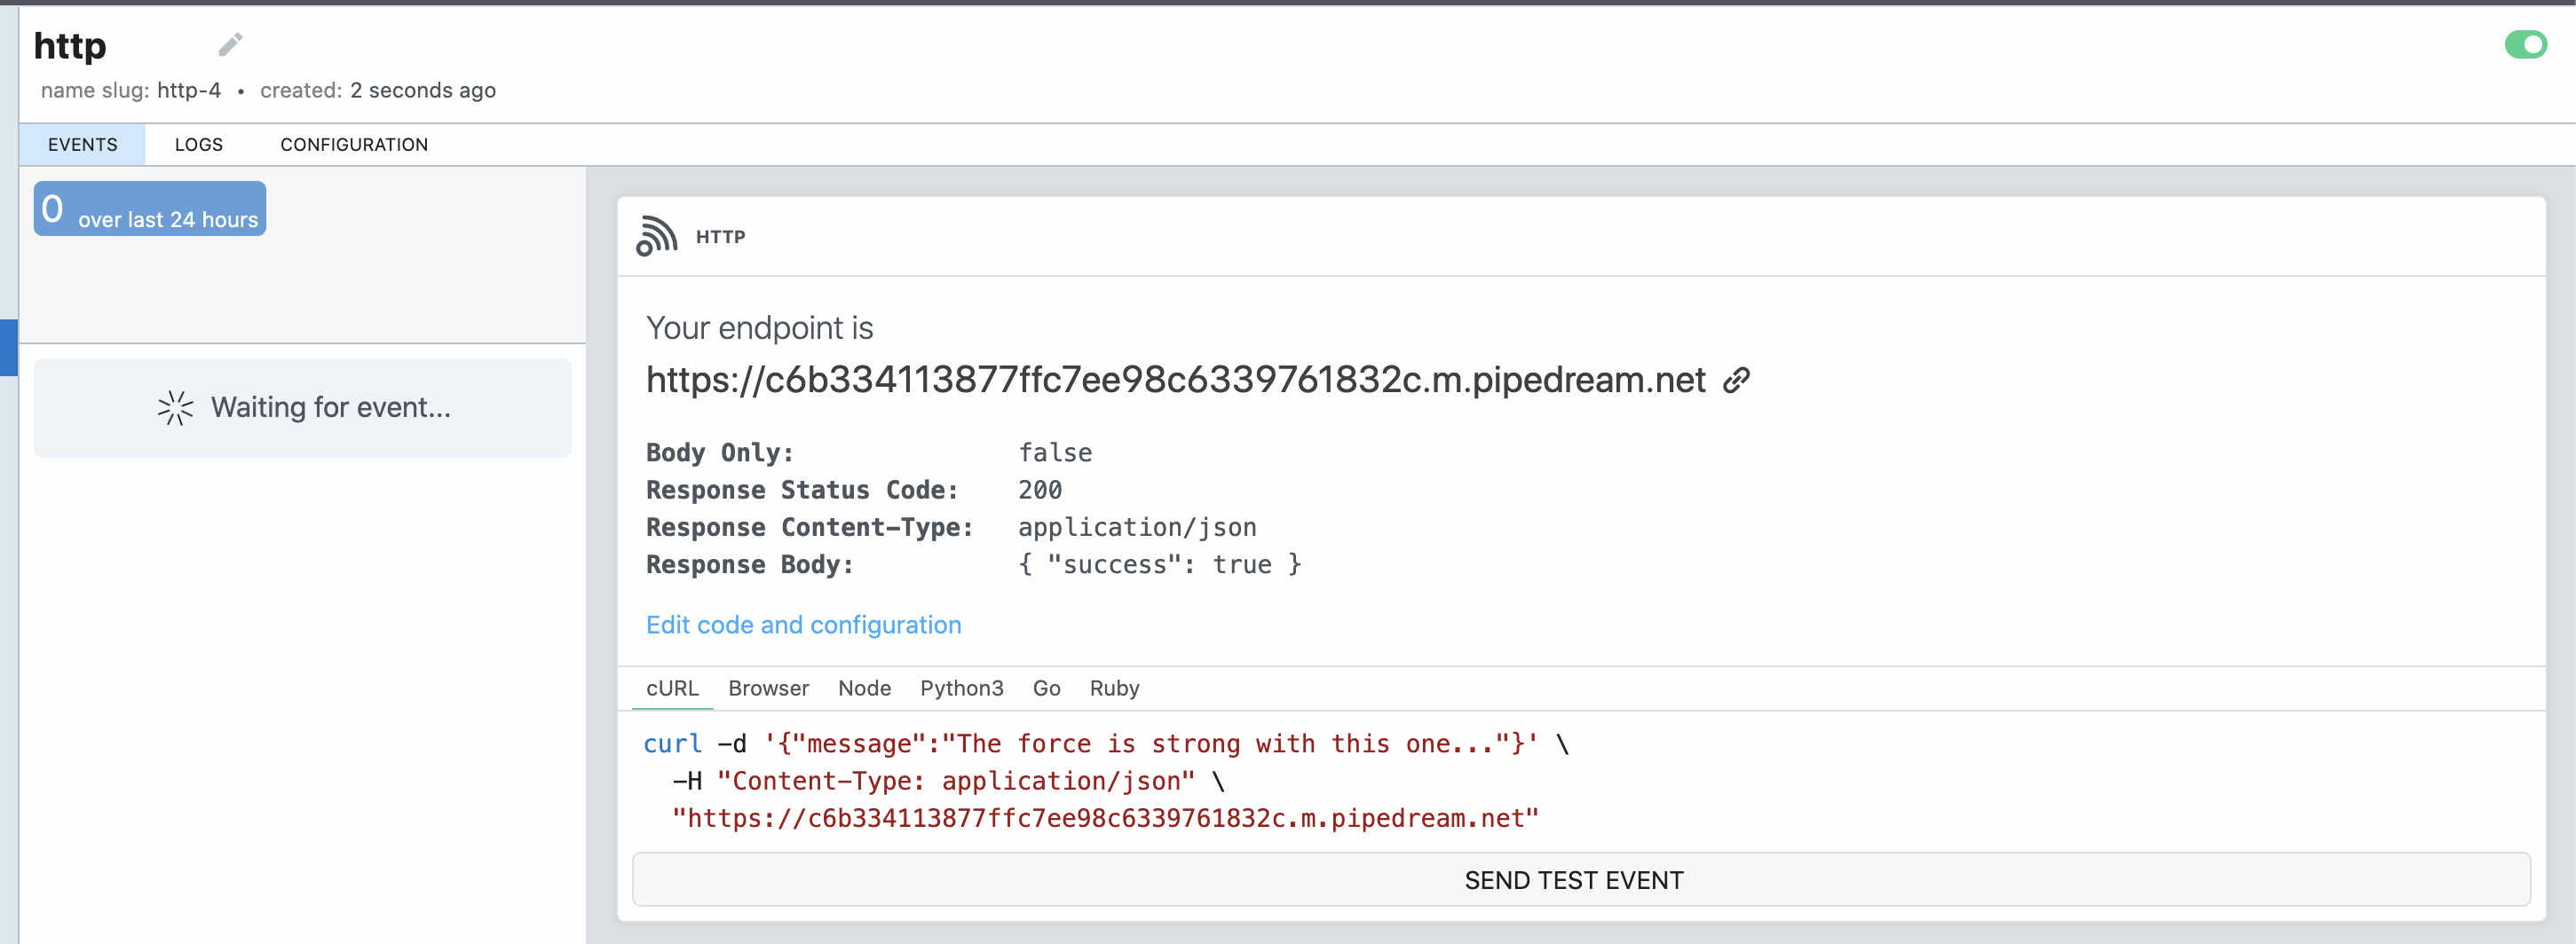
When you set up your request bin, you should see something like this:

Please note:
- The endpoint is shown in large bold letters. You'll need this endpoint when creating your webhook in MediaSilo.
- The "SEND TEST EVENT" button allows you to send an example message to your request bin. Give this a try to see how request bin works.
Creating the webhook
Now that we have a server listening, let's create a webhook. For this example, we'll create a webhook that responds to "Project Create" events. Anytime a user creates a new project in MediaSilo, our webhook should send a new message to our server.
curl --request POST \
  --url https://api.shift.io/v3/webhooks \
  --header 'content-type: application/json' \
  --header 'x-key: YOUR_API_KEY' \
  --header 'x-secret: YOUR_API_SECRET'
  --data '{"eventBinding":"project.create","transport":"http","transportProperties":{"endpoint":"https://c6b334113877ffc7ee98c6339761832c.m.pipedream.net"}}'
Notice the endpoint
In the above request, notice the "endpoint" value matches the endpoint from the request bin we created above.
Now go ahead and create a new project. A message will arrive at your request bin endpoint.
Creating project webhooks
You can scope your webhooks to specific projects. To limit webhooks from firing for events occurring outside of the project they are configured for, add a "filter" to you webhook. See how the following example scopes the webhook to the project "98b188c2-1e00-4e00-b216-0bbe8e25bc4a."
curl --request POST \
  --url https://api.shift.io/v3/webhooks \
  --header 'content-type: application/json' \
  --header 'x-key: YOUR_API_KEY' \
  --header 'x-secret: YOUR_API_SECRET'
  --data '{"id":"b76438da-892b-44e6-8e4a-fcddc72ff6d3","eventBinding":"asset.create","filter":{"project.id":["98b188c2-1e00-4e00-b216-0bbe8e25bc4a"]},"transport":"http","transportProperties":{"endpoint":"https://c6b334113877ffc7ee98c6339761832c.m.pipedream.net"}}'
Notice how the above example uses the "asset.create" event binding instead of the "project.create" event binding used in the previous example. This is because it's a project-scoped webhook. Since you can't create a project within a project, you wouldn't create a webhook for "project.create" within a project.
Webhook event bindings
There are several events for which you can set up webhooks.
| Action | Event Binding |
|---|---|
| A new project is created | project.create |
| A project is modified | project.update |
| A project is deleted | project.delete |
| An existing user is added to a project | project_users.create |
| A user is removed from a project | project_users.delete |
| A new user is invited to a project | project_invitation.create |
| A new asset is created | asset.create |
| An asset is modified | asset.update |
| An asset is deleted | asset.delete |
| An asset is ingested and ready for playback | asset_source.ready |
| A link has been created for one or more assets | quicklink.create |
| A link has been deleted | quicklink.delete |
Updated over 2 years ago
